8 Step Guide To Build A WordPress Membership Site
One reason people convert a current site to WordPress is to easily build a community of like-minded persons. They can easily build a WordPress membership site and help people with similar interests connect with each other. A membership website can be used for a variety of purposes. It can help businesses give special treatment to selected clients. Online tutors can use it to give paid lessons to their students. Such an interface allows bloggers to provide exclusive content to their chosen readers easily. However, people must not confuse it with a subscription site. A membership site may not necessarily charge money to register members. On the other hand, a subscription website involves a revenue agreement between the website owner and users. In this tutorial, we will explain the method to create a membership interface with WordPress.
1. Install A Membership Plugin
In order to create our website, we will be using a membership plugin. However, it is necessary to understand the objective you hope to achieve with the interface for selecting the correct tool. In case, you only want to provide a facility for registration, then you can do so with a contact form. People who want to introduce paid subscription and premium content features must use a plugin like MemberPress. Log in to the admin dashboard of your website installation. Go to “Plugins> Add new ” and enter the tool’s name in the search field. Download its files and then activate it on your website.
2. Configure The Plugin’s Settings
The plugin will become visible in the control panel menu after activation. Click on it and go to “Options”. A new screen divided into multiple tabs will open. In the first tab titled “Pages”, you will find the necessary pages for creating the interface. Here you can modify the “Thank you”, “Account”, and “Login” pages. Users can also add the slugs for the group and membership pages.
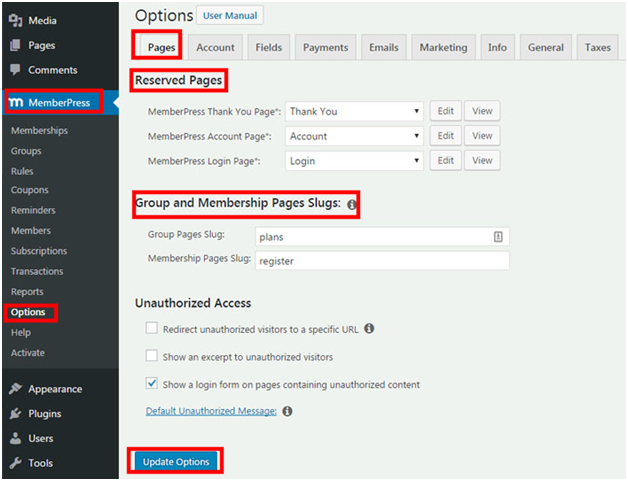
Hit the “Update Options” tab at the bottom of the screen and move to the next step.
3. Set Up A Payment Method
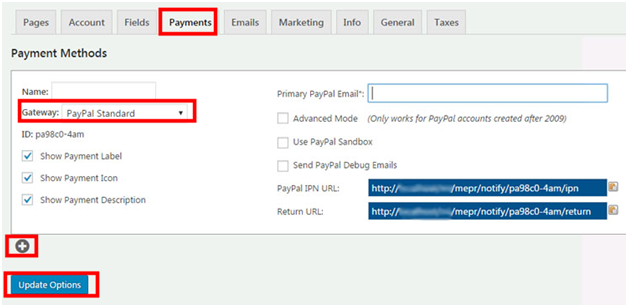
We will now discuss how a payment method can be added to the interface. On the same screen, switch to the tab named “Payments”. Right on top in the left-hand corner, you will see a dropdown menu for an option called “Gateway”. Click on the menu to see the various payment gateways that the product supports. You can choose from PayPal (Standard, Express, and Pro), Stripe, and Authorize.net. Select your preferred gateway and provide the necessary credentials. You can also choose more than one payment method by using the add button. Click the “Update Options” button to save the changes.
4. Create Different Membership Levels
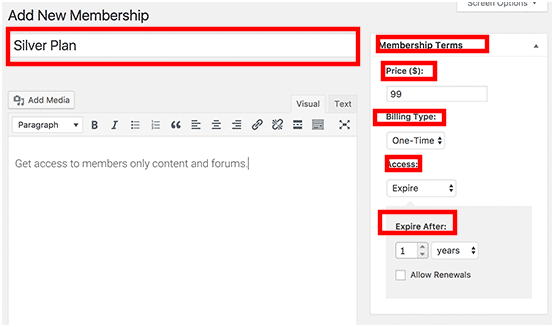
In this step of our guide to build a WordPress membership site, we will create different membership levels. This will allow us to create different plans with separate pricing and access controls. Go back to the menu of your dashboard and click on “MemberPress > Membership”. Press the “Add New” tab on the screen which opens. This will take you to a screen similar to the WordPress text editor. Enter a name for your plan in the field displayed on top. On the right-hand side, you will find the “Membership Terms” section. Enter a figure in the price section. In the “Billing Type” option, choose whether you want subscribers to make recurring or one-time payments. Select a duration after which the plan will expire.
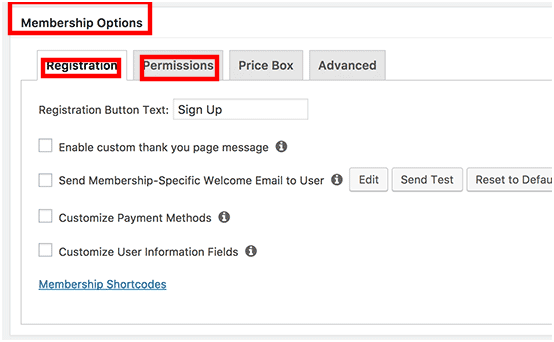
Scroll down to the “Membership Options” section. Modify permissions, the registration button text, and other options and hit the “Publish” tab. Users can repeat the process to create other membership plans.
5. Set Access Rules For The membership Plans
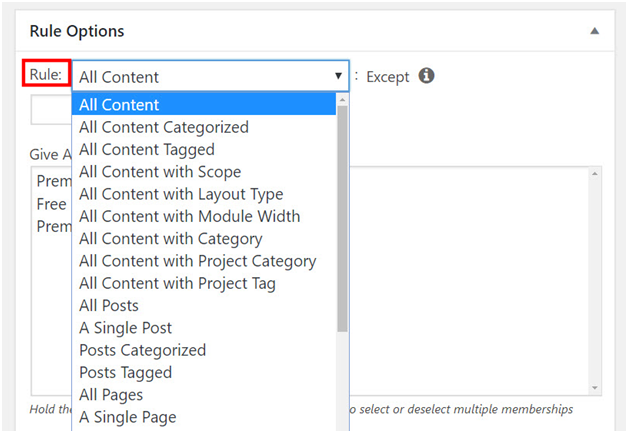
We will now define the rules for our different plans. This will ensure that users access only that content for which they are eligible. Go to “Rules” in the Member Press menu. Click the “Add new” tab on the screen. You can now select content belonging to a particular category or tag and make it available to specific plan members. Users have the option of setting even more specific rules. Simply click the dropdown menu against the “Rule” option and you can control access to a single post, page, etc.
6. Add Exclusive Content
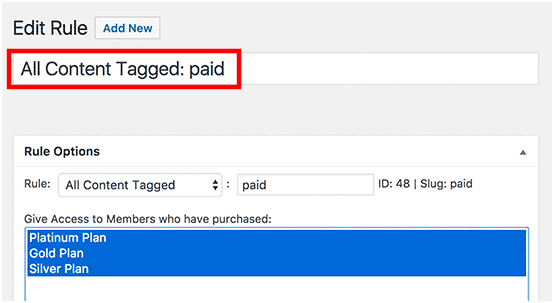
We will now discuss how to add content for a specific membership group. For instance, we define a rule which states that all content tagged as “paid” will have restricted access.
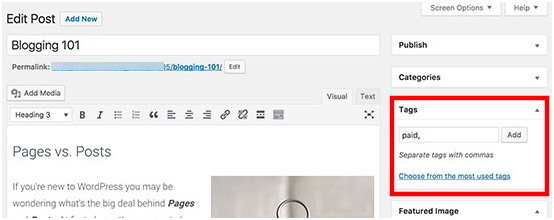
Now, identify a piece of content that you do not want to display to free users. Open it in the editor and simply add the tag “paid” to it.
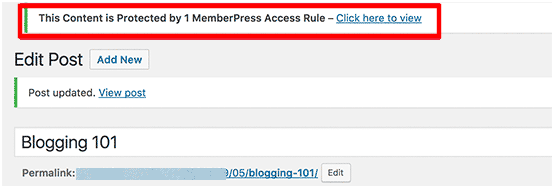
Below the post editor, you will see a meta box. Here you can choose the message which unauthorized members will see when they try to access the post. After making the modifications, hit the “Publish” tab. You will see a message displaying the restricted access status of the content as soon as the page reloads.
7. Generate A Pricing Page
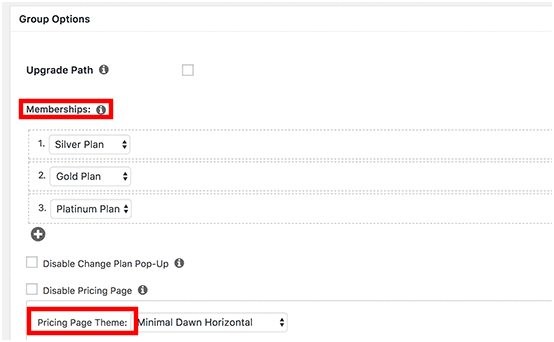
Go to “MemberPress > Groups” and press “Add new”. Enter a title for the plan page and scroll down to “Group options”. Select the membership plans you want to display on the page. You can also choose a theme for the page. Hit the “Publish” tab to generate the pricing page.
Click “view Group” to check the newly-created page. Now go to “MemberPress > Groups”. Copy the URL displayed against the new group and then visit “ MemberPress > Options”.

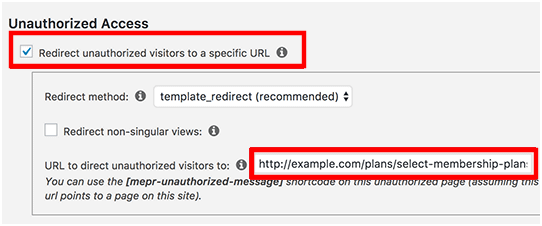
In the “Unauthorized Access” section, tick the box “Redirect unauthorized visitors to a specific URL”. Paste the URL and select “Update Options”. Anyone who wishes to access the restricted page will be directed to the pricing page.
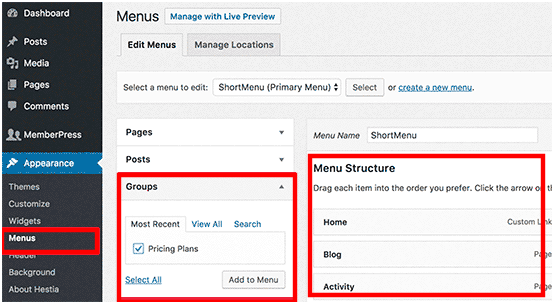
8. Include A Login Form
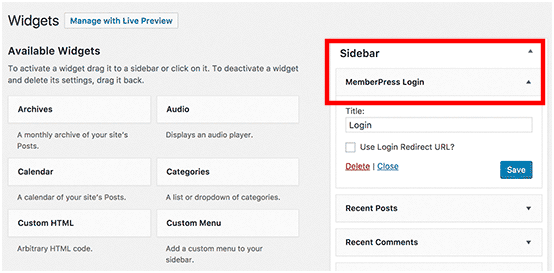
Your subscribers will need to be provided a login form to enable them to access content they have paid for. In the dashboard menu, click on “Appearance” and go to “Widgets”. Place the “MemberPress login” widget in the sidebar.
Go to “Appearance >Menus” and expand the “Groups” option. Tick the box next to the pricing page option and press “Add to menu”. The pricing plan will now be visible in the “Menu Structure” section. Press “Save Menu” and visit your website to check how it looks.
Conclusion
This is a simple method to build a WordPress membership site without needing to write any code. It will help users in building a community and generating good revenue.
Author Bio
Jacob Graves is a Sr. WordPress Developer at HireWPGeeks Ltd, a company that converts html to responsive wordpress in a convenient manner. He is a passionate writer and loves to share WordPress and SEO related tutorials.